Create a darling scrubby amigurumi this spring with my Darla the Duck Crochet pattern!

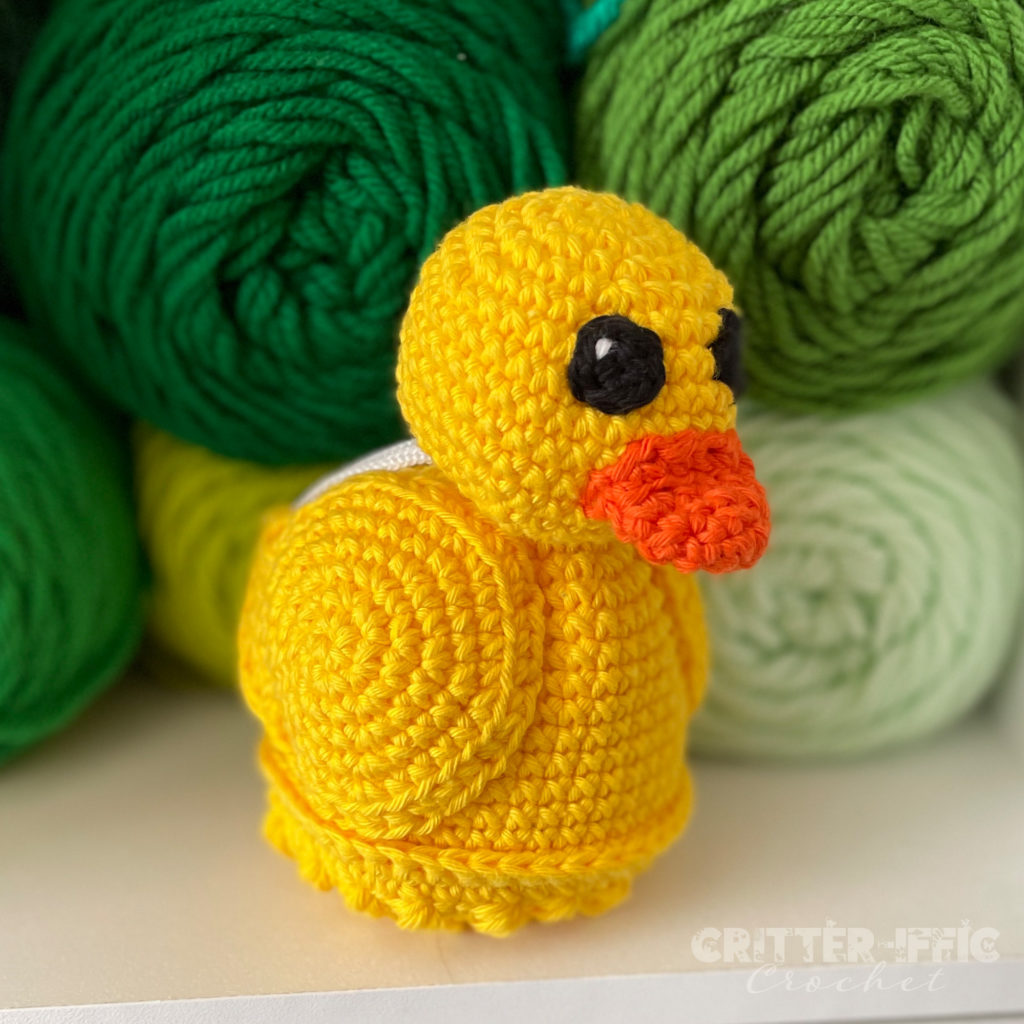
Meet Darla the Duck!
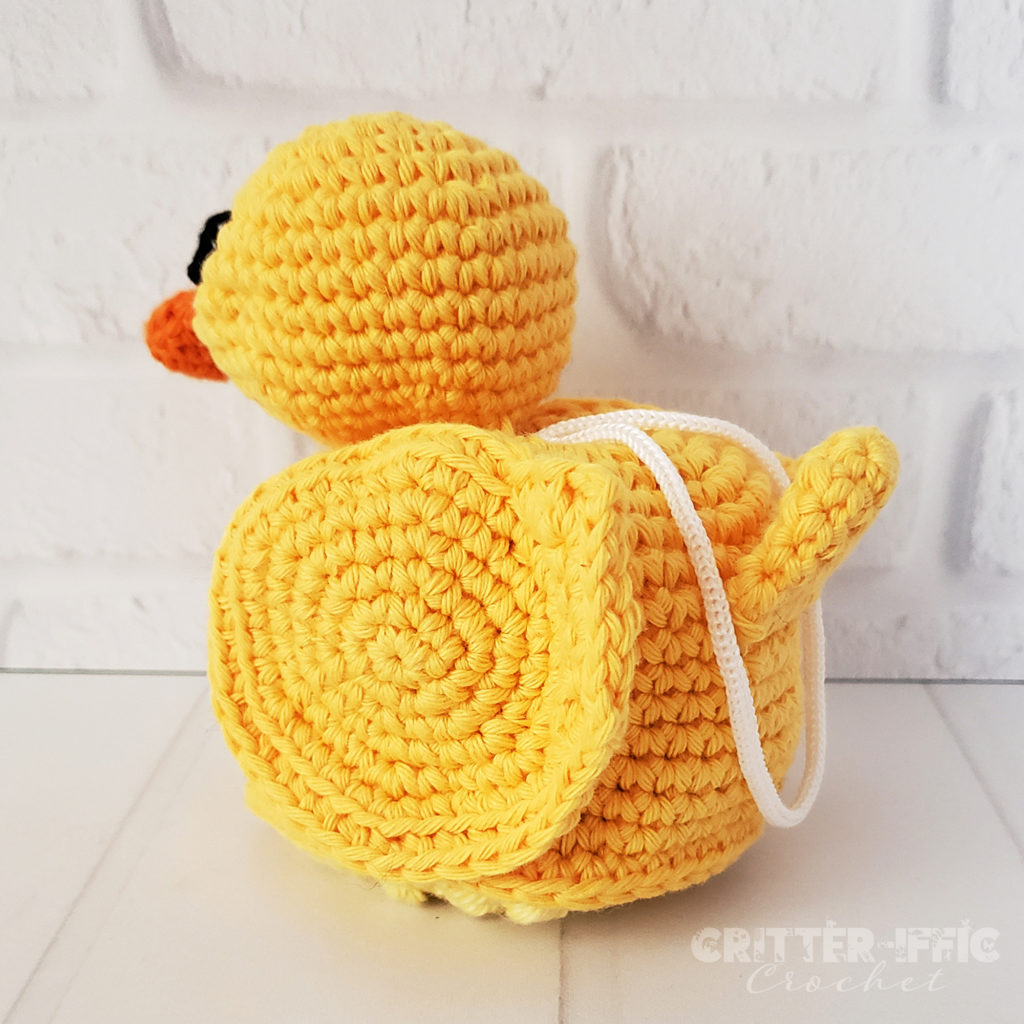
This little duckling is the cutest in the crew. Pretty and petite, this scrubby amigurumi crochet pattern is sure to be a hit with all ages! Created in cotton yarn, she features a puff stitch textured base perfect for building up suds, and is filled with a light and airy nylon puff and the tulle from a deconstructed second one. This enables her to hang dry quicker in between laundry days while she waits for her turn in the machine!
Let’s get started on this bath time pal!
Materials needed
Worsted Weight Cotton Yarn (4)
• 100 yards main color (This is the color you wish your duck to be. I used Paintbox Simply Cotton Aran in buttercup yellow for main photo)
• 10 yards accent color (This is the color that will be used for the beak,I used Paintbox Simply Cotton Aran in blood orange for main photo)
• <5 yards each of black, pink and white yarn (for the eyes, nose and tail)
Other Materials needed
• 4mm crochet hook, I use Clover Amour Crochet Hook: 4.0mm
• (2) 3″ bath poofs
• Yarn needle, stitch marks and scissors.
Gauge
4 Sc Sts across and 4 Sc rows = 4″.
This will create a Darla the duck scrubby amigurumi approx. 3.5″ across when completed with suggested yarn and hook, however if you wish to make it larger or smaller, simply increase or decrease yarn weight and hook sizes.
Stitch Key
• Ch: Chain
• Sl St: Slip Stitch
• St (s): Stitch(es)
• Sc: Single Crochet
• Sc Inc: Place 2 Sc Sts into the same St to increase by 1
• Sc Dec: Sc the next 2 Sts together to decrease by 1
• Sk: Skip St
• MR: Magic Ring
• []: Repeat the Sts between these as many times as stated after.
• (): Place all Sts within these into the the same St
• FO: Fasten off with a Sl St to the first St made or use the invisible join method
• PUFF: Puff Stitch. Yarn over, insert your hook, and pull up a loop. Repeat 2 more times into the same St, Yarn over and pull through all 7 loops on hook to complete puff. Do not Ch x 1 to close puff St for this pattern.
How to read this pattern
Example: Round 4: [Sc, Sc Inc, Sc] x 6. (24)
What that means: Single crochet into the next St, then place 2 Single crochet into the next stitch to increase, and Single crochet into the next stitch. Repeat this set of instructions within the [ ] 6 times around, ending with a count of 24 stitches total in round 4.
Body
• With main color yarn
• Worked in the round
Round 1: 6 Sc into MR. (6) Pull closed.
Round 2: [Sc Inc] x 6. (12)
Round 3: [Sc Inc, Sc] x 6. (18)
Round 4: [Sc Inc, Sc x 2] x 6. (24)
Round 5: [Sc Inc, Sc x 3] x 6. (30)
Round 6: [Sc Inc, Sc x 4] x 6. (36)
Round 7: [Sc Inc, Sc x 5] x 6. (42)
Round 8: [Sc Inc, Sc x 6] x 6. (48)
Rounds 9-17: Sc x 48. (48) (9 rounds)
• FO, weave in end.
Belly
• With accent color yarn
• Worked in the round. You will be joining and flipping over after each round
Round 1: 6 Sc into MR, Sl st to first Sc to close, Ch x 1, turn. (6)
Round 2: [Sc Inc] x 6, Sl St to first Sc to close, Ch x 1, turn. (12)
Round 3: [PUFF, Sc Inc] x 6, Sl St to PUFF to close, Ch x 1, turn. (18)
Round 4: [Sc Inc, Sc x 2] x 6, Sl St to first Sc to close, Ch x 1, turn. (24)
Round 5: [Sc, PUFF, Sc Inc, PUFF] x 6, Sl St to first Sc to close, Ch x 1, turn. (30)
Round 6: [Sc Inc, Sc x 4] x 6, Sl St to first Sc to close, Ch x 1, turn. (36)
Round 7: [PUFF, Sc, PUFF, Sc Inc, PUFF, Sc] x 6, Sl St to PUFF to close, Ch x 1, turn. (42)
Round 8: [Sc Inc, Sc x 6] x 6, Sl St to first Sc to close, Ch x 1 and turn. (48)
• Insert the poof into the center of the body, and pull cord through the gap left in the center of round 1.
• Position the base with the puffy side of the PUFF Sts facing outward.
• Working through both round 8 of the base, and round 17 of the body, attach your main color yarn and Sc x 48 to join and close.
• FO, weave in any remaining ends.
Head
• With your main color yarn
• Worked in the round
Round 1: 6 Sc into MR. (6)
Round 2: [Sc Inc] x 6. (12)
Round 3: [Sc Inc, Sc] x 6. (18)
Round 4: [Sc Inc, Sc x 2] x 6. (24)
Round 5: [Sc Inc, Sc x 3] x 6. (30)
Round 6: [Sc Inc, Sc x 4] x 6. (36)
Rounds 7- 11: Sc x 36. (36) (5 rounds)
Round 12: [Sc Dec, Sc x 4] x 6. (30)
Round 13: [Sc Dec, Sc x 3] x 6. (24)
Round 14: [Sc Dec, Sc x 2] x 6. (18)
Round 15: [Sc Dec, Sc] x 6. (12)
• Stuff head.
• FO, leave long tail.
Beak
• With your beak yarn
• Worked in the round
Round 1: 6 Sc into MR. (6)
Round 2: [Sc Inc, Sc] x 3. (9)
Round 3: [Sc Inc, Sc x 2] x 3. (12)
Round 4: Sc x 12. (12)
Round 5:BLO: Sc x 6, Sl St. (7) There will be Sts left over from round 4.
• FO, Leave long tail.
• Sew beak to head between rounds 8-10.
Eyes (make 2)
• With your black yarn
• Worked in the round
Round 1: Sc x 6 into MR. (6)
• FO, leave long tail.
• Sew eyes above beak.
• Using a small piece of white yarn, add a stitch in the eye for an accent.
Wings Part 1(make 2)
• With your main color yarn
• Worked in the round
Round 1: 6 Sc into MR. (6)
Round 2: [Sc Inc] x 6. (12)
Round 3: [Sc Inc, Sc] x 6. (18)
Round 4: [Sc Inc, Sc x 2] x 6. (24)
Round 5: [Sc Inc, Sc x 3] x 6. (30)
Round 6: [Sc Inc, Sc x 4] x 6. (36)
Round 7: Sc Dec, Sc x 4, Sc Dec, Ch x 1, turn. (6) There will be Sts left over from round 6.
First Wing
Row 1: Sc Dec, Sc x 3, Sc Inc, Ch x 1, turn. (6)
Row 2: (Hdc, Sc), Sc x 3. Sc Dec, Ch x 1. (6) Do not turn.
Edge (work around entire piece, starting at the bottom edge of wing): Sc x 3, BLO: Sc x 28, Sc x 3, Ch x 1, Sc x 6, Sl St to first Sc to close. (40)
• FO, leave long tail.
Second Wing
Row 1: Sc Inc, Sc x 3, Sc Dec, Ch x 1, turn. (6)
Row 2: Sc Dec, Sc x 3, (Sc, Hdc), Ch x 1. (6) Do not turn.
Edge (work around entire piece, starting at the top edge of wing): Sc x 3, BLO: Sc x 28, Sc x 3, Ch x 1, Sc x 6, Sl St to first Sc to close. (40)
• FO, leave long tail.
Tail
• With your main color yarn
• Worked in the round
Round 1: 6 Sc into MR. (6)
Round 2: [Sc Inc, Sc] x 3. (9)
Round 3: [Sc Inc, Sc x 2] x 3. (12)
Round 4: Sc x 12. (12)
Round 5: [Sc x 5, Sc Inc] x 2. (14)
• Pinch together, work through both sides at once to seam closed and Sc across.
• FO, leave long tail. (figure 12)
• Sew head to body with beak facing forward along rounds 2-7.
• Sew one wing to each side of the body between rounds 4-16 with right side of the edge facing out and the wing tip edge facing the back.
• Sew tail to the back center of body.
I hope you have enjoyed creating my Darla the Duck pattern! Once you make one, send it to me so I can share it in the community gallery!
Darla the Duck scrubby amigurumi pattern is available in a stylized PDF version on Ravelry, Etsy,& Lovecrafts and comes with helpful step by step pictures.

I am a Lovecrafts affiliate, and I have affiliate links within this following section for yarn that I have used for this design. If you complete a purchase is from my affiliate link, I will receive a small commission of your sale, at no additional cost to you. However, if you do not wish to use them, I completely understand. My recommendations and yarn used still remain the same regardless.
Leave a Reply
You must be logged in to post a comment.