
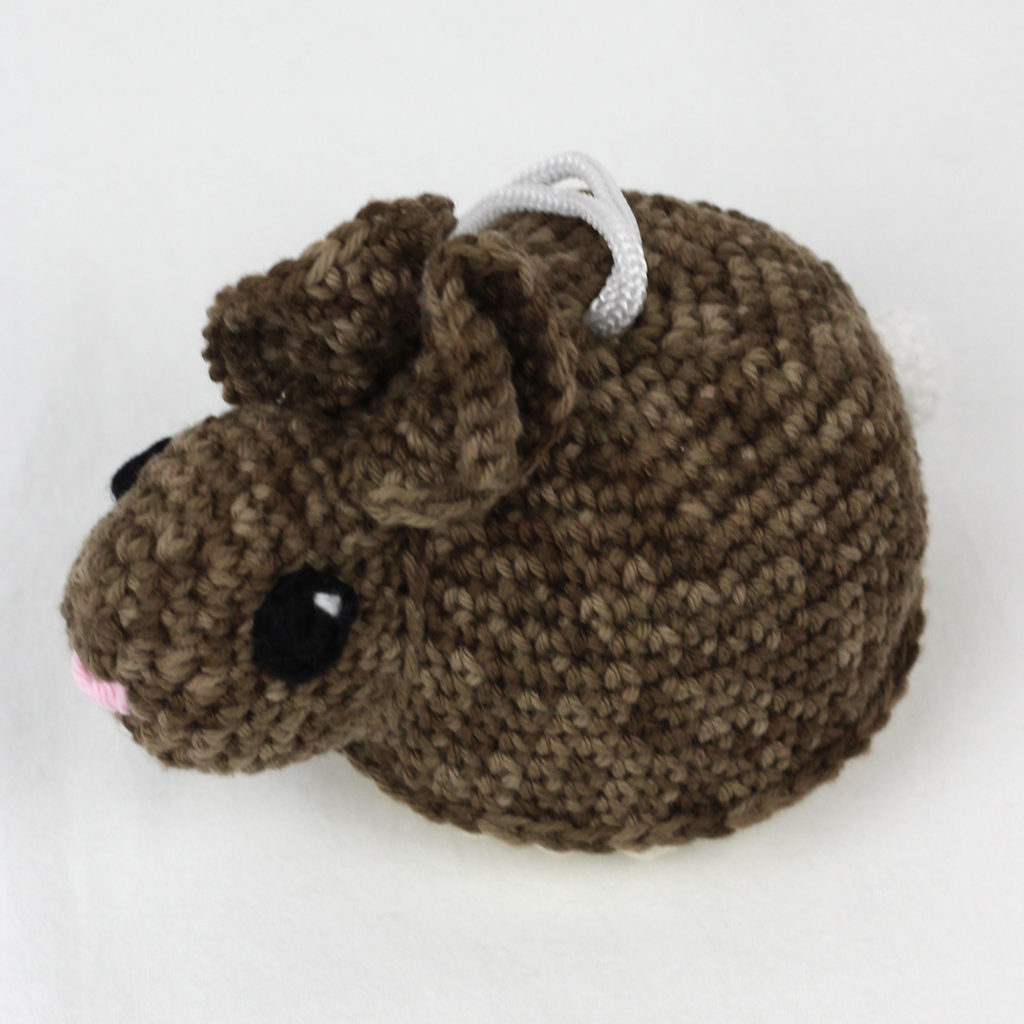
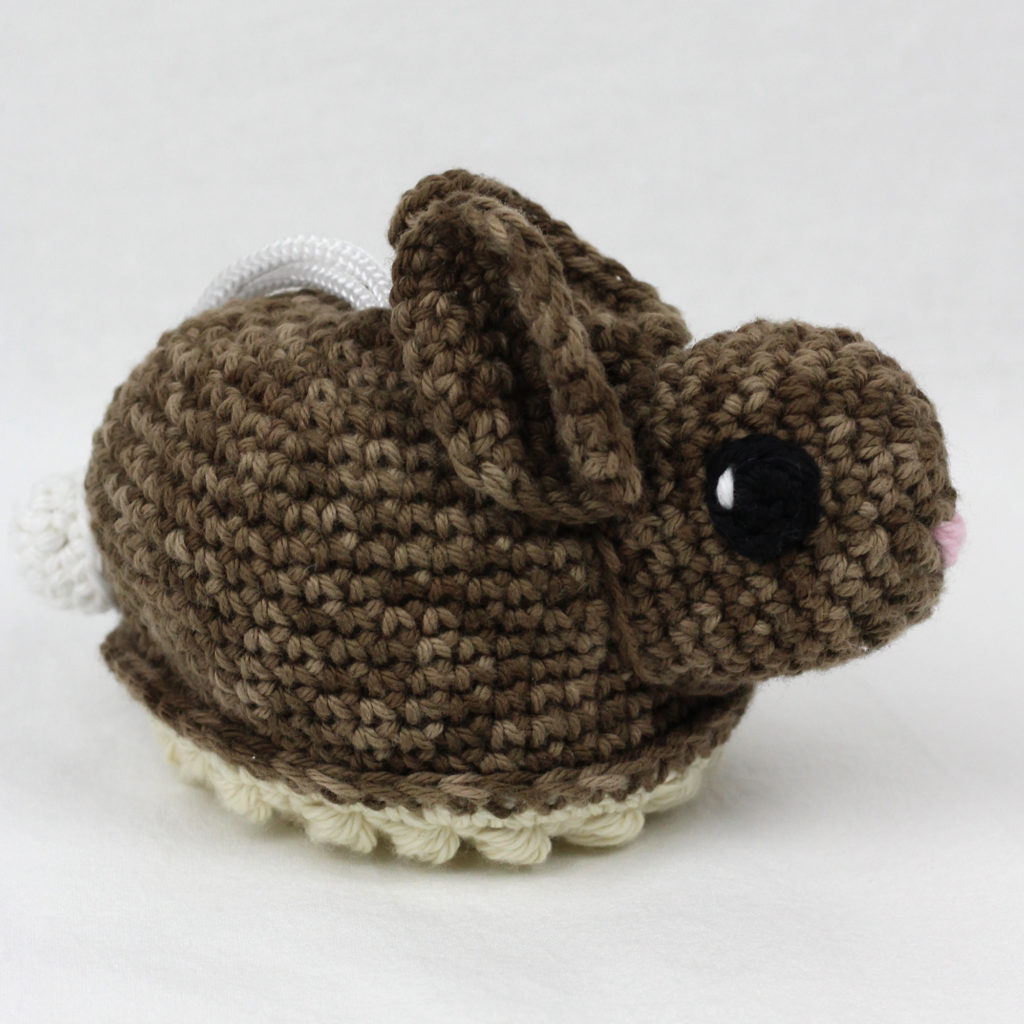
Create the cutest palm sized bunny scrubby amigurumi this spring with my Bitsy the Bunny Crochet pattern! Springtime suds for bath time fun!
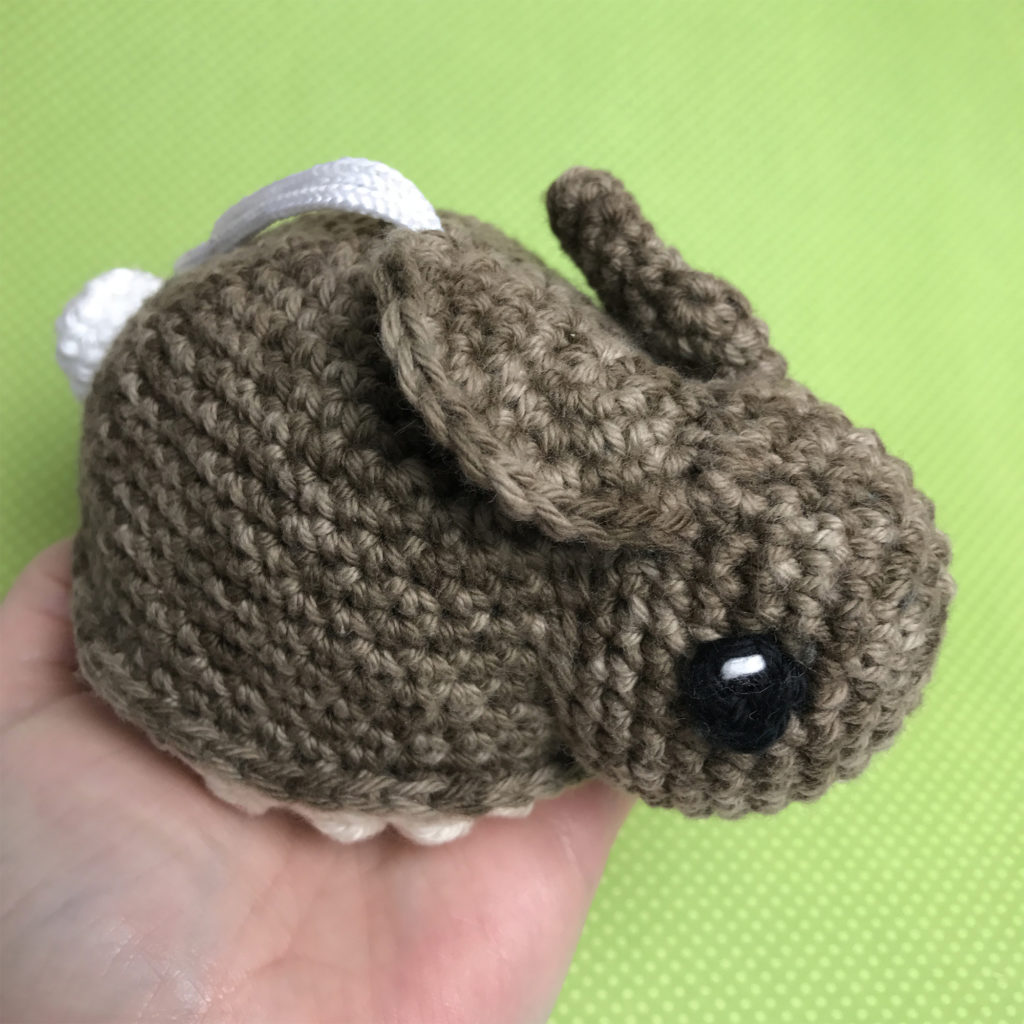
Meet Bitsy!
This shy little bunny is one of our sweetest scrubby designs here at the studio. Pretty and petite, this bunny scrubby amigurumi crochet pattern is sure to be a hit with all ages! Created in cotton yarn, she features a puff stitch textured base perfect for building up suds, and is filled with a light and airy nylon puff and the tulle from a deconstructed second one. This enables her to hang dry quicker in between laundry days while she waits for her turn in the machine!
Let’s get started on this springtime sweetheart.
Materials needed
Worsted Weight Cotton Yarn (4)
• 90 yards main color (This is the color you wish your bunny to be. I used Catona Denim for main photo)
• 30 yards accent color (This is the color that will be used for the belly)
• <5 yards each of black, pink and white yarn (for the eyes, nose and tail)
Other Materials needed
• 4mm crochet hook, I use Clover Amour Crochet Hook: 4.0mm
• (2) 3″ bath poofs
• Yarn needle, stitch marks and scissors.
Gauge
4 Sc Sts across and 4 Sc rows = 4″.
This will create a bunny scrubby amigurumi approx 3.5″ across when completed with suggested yarn and hook, however if you wish to make a larger or smaller bunny, simply increase or decrease yarn weight and hook sizes.
Stitch Key
• Ch: Chain
• Sl St: Slip Stitch
• St (s): Stitch(es)
• Sc: Single Crochet
• Sc Inc: Place 2 Sc Sts into the same St to increase by 1
• Sc Dec: Sc the next 2 Sts together to decrease by 1
• Sk: Skip St
• MR: Magic Ring
• []: Repeat the Sts between these as many times as stated after.
• (): Place all Sts within these into the the same St
• FO: Fasten off with a Sl St to the first St made or use the invisible join method
• PUFF: Puff Stitch. Yarn over, insert your hook, and pull up a loop. Repeat 2 more times into the same St, Yarn over and pull through all 7 loops on hook to complete puff. Do not Ch x 1 to close puff St for this pattern.
How to read this pattern
Example: Round 4: [Sc, Sc Inc, Sc] x 6. (24)
What that means: Single crochet into the next St, then place 2 Single crochet into the next stitch to increase, and Single crochet into the next stitch. Repeat this set of instructions within the [ ] 6 times around, ending with a count of 24 stitches total in round 4.
Body
• With main color yarn
• Worked in the round
Round 1: 6 Sc into MR. (6) Pull closed.
Round 2: [Sc Inc] x 6. (12)
Round 3: [Sc Inc, Sc] x 6. (18)
Round 4: [Sc Inc, Sc x 2] x 6. (24)
Round 5: [Sc Inc, Sc x 3] x 6. (30)
Round 6: [Sc Inc, Sc x 4] x 6. (36)
Round 7: [Sc Inc, Sc x 5] x 6. (42)
Round 8: [Sc Inc, Sc x 6] x 6. (48)
Rounds 9-17: Sc x 48. (48) (9 rounds)
• FO, weave in end.
Belly
• With accent color yarn
• Worked in the round. You will be joining and flipping over after each round
Round 1: 6 Sc into MR, Sl st to first Sc to close, Ch x 1, turn. (6)
Round 2: [Sc Inc] x 6, Sl St to first Sc to close, Ch x 1, turn. (12)
Round 3: [PUFF, Sc Inc] x 6, Sl St to PUFF to close, Ch x 1, turn. (18)
Round 4: [Sc Inc, Sc x 2] x 6, Sl St to first Sc to close, Ch x 1, turn. (24)
Round 5: [Sc, PUFF, Sc Inc, PUFF] x 6, Sl St to first Sc to close, Ch x 1, turn. (30)
Round 6: [Sc Inc, Sc x 4] x 6, Sl St to first Sc to close, Ch x 1, turn. (36)
Round 7: [PUFF, Sc, PUFF, Sc Inc, PUFF, Sc] x 6, Sl St to PUFF to close, Ch x 1, turn. (42)
Round 8: [Sc Inc, Sc x 6] x 6, Sl St to first Sc to close, Ch x 1 and turn. (48)
• Insert the poof into the center of the body, and pull cord through the gap left in the center of round 1.
• Position the base with the puffy side of the PUFF Sts facing outward.
• Working through both round 8 of the base, and round 17 of the body, attach your main color yarn and Sc x 48 to join and close.
• FO, weave in any remaining ends.
Head
• With your main color yarn
• Worked in the round
Round 1: 6 Sc into MR. (6) Pull closed
Round 2: [Sc Inc] x 6. (12)
Round 3: [Sc Inc, Sc] x 6. (18)
Round 4: [Sc Inc, Sc x 2] x 6. (24)
Round 5: [Sc Inc, Sc x 3] x 6. (30)
Rounds 6-9: Sc x 30. (30)(4 rounds)
Round 10: [Sc Dec, Sc] x 6, Sc x 12. (24)
Round 11: Sc x 24. (24)
• FO, leave long tail.
• Lightly stuff head with a second deconstructed bath poof
• With the decreases of round 10 at the top, sew to body just above bottom edge.
Ears (make 2)
• With your main color yarn
• Worked in the round
Round 1: 6 Sc into MR. (6) Pull closed.
Round 2: [Sc Inc] x 6. (12)
Round 3: [Sc Inc, Sc] x 6. (18)
Round 4: [Sc Inc, Sc x 2] x 6. (24)
Round 5: Sc x 11, Sc Inc x 2, Sc x 11. (26)
• FO leave long tail.
• Fold ear in half with right side facing out, and the 2 increases at the top, one on each half.
• Thread yarn tail on needle and whip stitch the bottom of the ear 3 or 4 times to keep pinched.
• Sew ears to the head along round 10 with open edges facing out and about a St between them.
Eyes (make 2)
• With your main color yarn
• Worked in the round
• With your black yarn
• Worked in the round
Round 1: Sc x 6 into MR. (6)
• FO, leave long tail.
• Sew one to each side of the head along rounds 6-9.
• Using a small piece of white yarn, stitch an accent into each eye.
• Using pink yarn, add a few stitches in front center of face along the lower part of round 2 of the head for nose.
Tail
• With your white yarn
• Worked in the round
Round 1: 6 Sc into MR. (6)
Round 2: [Sc Inc, Sc] x 3. (9)
Rounds 3-4: Sc x 9. (9)(2 rounds)
• FO, leave long tail.
• Sew to back bottom center of body.
• Weave in any remaining ends
I hope you have enjoyed creating my Bitsy the bunny pattern! Once you make one, send it to me so I can share it in the community gallery!
Leave a Reply
You must be logged in to post a comment.